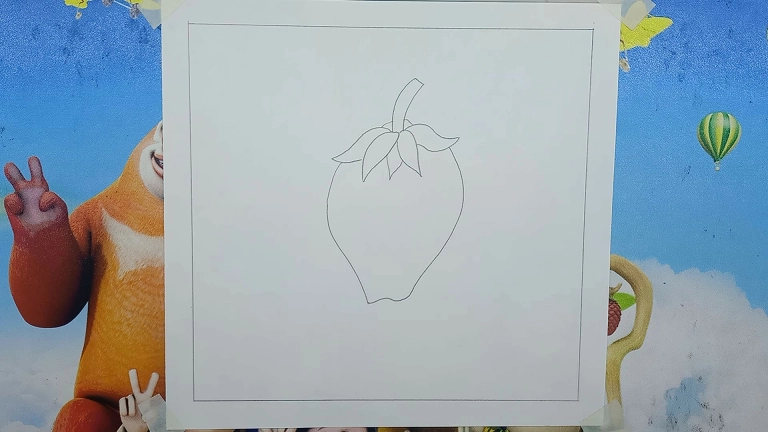
Are you looking for an easy tutorial on Strawberry Drawing?
The step-by-step guide on this tutorial will show you how to make Strawberry Drawing in 20 minutes with just the most basic drawing steps.
Strawberry Drawing is usually complex, but after completing this guide, you will have beautiful Strawberry art ready to showcase.
This guide is made especially for beginners. I will walk you through every step, using plenty of pictures and a video to make it clear.
If you get stuck or have questions at any point, send me a message on WhatsApp, Facebook, or Instagram. Also, you can send me a message from the contact us page. I will do my best to help you out.
I know that Strawberry Drawing can seem overwhelming and intimidating. This tutorial is about drawing for beginners and will teach you how to draw strawberries with just the most basic drawing steps. So whether your age is 10 or 50, you can make this drawing in just 20 minutes.

How to Make Strawberry Drawing in 8 Steps
Learn how to make Strawberry Drawing like the above one in about 20 minutes by following these steps:
- Draw the stalk
- Draw the Leaves
- Draw Exocarp
- Make Detail on Exocarp
- Color the leaves
- Color the Exocarp
- Color the Detailed area
- Finalize the Strawberry Drawing
| Requirements | Quantity |
| White paper | 1 |
| Pencil | 2 |
| Color Box | 1 |
| Marker | 1 |
Step 1: Draw the stalk
We start the drawing from the stalk. Firstly, take a pencil and draw two curve lines. Now join the upper side with a line like the below picture.

Step 2: Draw the Leaves
In this step, from the end of the stalk, start drawing some leaves. Make sure the leaves are small and downwards.

Step 3: Draw Exocarp
Now we will draw the Exocarp or outline of the Strawberry. Try to make the exocarp’s shape like this.

Step 4: Make Detail on Exocarp
Here we need to make some small points in the exocarp. This will gives detail to the Strawberry.

Step 5: Color leaves of the Strawberry Drawing
Okay, our drawing is complete. Now it’s time to fill color. Firstly, take the Green color and fill it in the stalk and the leaves. Make sure to fill with a downwards pattern.

Step 6: Color the Exocarp
After that take a red color and start filling the whole Exocarp except the small points.

Step 7: Color the Detailed area
Now we fill those small points with yellow color. If you can’t fill the small points with oil pastel then take a yellow pencil and fill those.

Step 8: Finalize the Strawberry Drawing
At the end take a black marker and make outline. After finishing the outline, you can see our Strawberry drawing looks awesome.

Video Tutorial on Strawberry Drawing
Here is a video tutorial on this drawing. This video tutorial is very helpful for beginners. In this tutorial, we explain every step of the painting slowly. So follow our video tutorial.
While normally these plants are quite hardy, especially those planted in the ground, keeping them in strawberry pots (or jars) outdoors over winter is not recommended.
You can plant your indoor berries any time of year. No need to wait for the normal growing season.
Yes, you can take them with you.
Also, learn how to make a Beautiful Sunset Scenery Drawing.
Wrapping up
I believe that this article helped you to make Strawberry drawing easily. If that’s the case, I would love to view your drawing. Feel free to leave a comment below with your drawing experience and send me the Strawberry Drawing pictures on WhatsApp, Facebook, or Instagram. Your review or comment will make this blog’s article more effective.
If you are still undecided, check out our related drawing to get many more tutorials. Additionally, you can comment on your requirements, and our team of experts will reply with personalized recommendations.
Thanks for reading.
Have a good day and a happy drawing experience.