Welcome to our easy deer drawing tutorial, where we’ll walk you through the simple and enjoyable process of creating your own charming depiction of a baby deer. In this step-by-step guide, we’ll show you how to draw and color a delightful deer illustration. Whether you’re a beginner or an experienced artist, follow along and bring your artistic vision to life. Don’t forget to bookmark our website for more drawing ideas and tutorials!
Let’s start drawing baby deer without delay, little friends.
How to Draw Baby Deer Step by Step
Here is some very easy and simple step to draw a baby deer.

Baby Deer Drawing Requirement Materials :
Here are the materials we need to make this fire deer drawing a picture.
- White paper
- Pencil
- Pencil sharpener
- Eraser
- Color Box
- Tissue paper
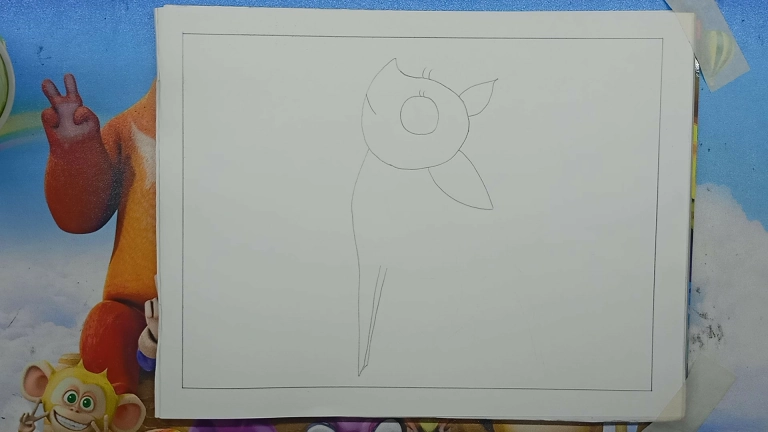
1. Begin with the Head and Nose.

To start, gather your materials and prepare a clean sheet of white paper. Leave a small margin of about half an inch around the edges. Draw evenly-spaced margins on all sides. Now, sketch the rounded shape of the baby deer’s head and the distinctive triangular form of its nose.
2. Define the Facial Features.

Extend a subtle line below the nose to create the deer’s mouth. Proceed to draw the eyes as gentle ovals and add eyebrows just above them. Then, outline the adorable ears on the back of the deer’s head.
3. Draw the Front Legs.

Focus on the front legs. Draw a vertical line extending from the head downward to represent the first leg. For the second leg, draw another line diagonally from the midpoint of the first line to the side.
4. Outline the Body.

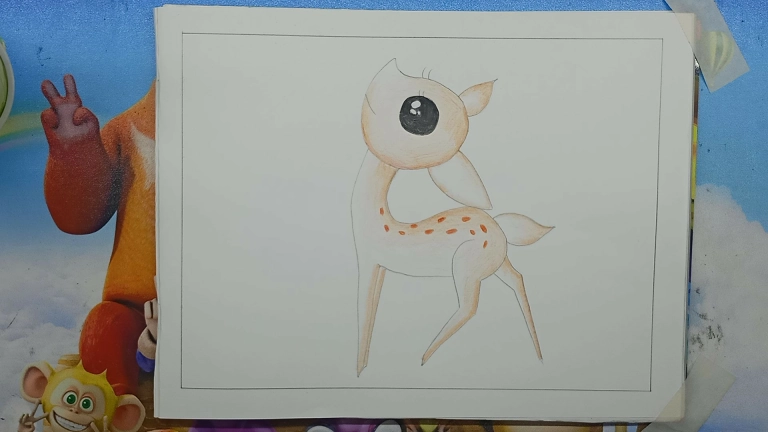
Now, let’s define the baby deer’s body. Draw a line connecting the front legs to the back, forming the belly. Next, depict the legs on the back portion of the deer’s body, allowing some space between them. Pay attention to the knee folds of the hind legs. Use graceful curves to sketch the neck and back, and don’t forget to add the tail at the rear.
Look our deer sketch is almost complete. Now we color it step by step.
5. Add Color to the Face and Ears.

It’s time to bring your drawing to life with color! Take a light brown shade and gently color the entire face and both ears of the baby deer.
6. Color the Body.

Using the same light brown hue, carefully color the neck, front legs, belly, hind legs, back, and tail. Remember, we’re aiming for a soft and natural look, so avoid using a dark brown color at this stage.
7. Create Distinctive Patterns.

Add a touch of character to your deer illustration by painting closely spaced, brown-colored striped spots across the body. This step adds depth and texture to your artwork.
8. Accentuate the Eyes and Eye Stars.

Enhance the eyes by using a deep black color to fill them in. Apply a crisp white color to the eye stars, creating a captivating and lifelike effect.
9. Refine the Details.

Use a black marker pen to redefine the mouth line and emphasize the eyebrows. Color the four hooves of the deer’s legs with a solid black, and use the marker pen to highlight the contours of the deer’s body.
10. Complete the Scene with Grass and Flowers.

Let’s complete our deer illustration by adding a touch of nature. Color the grass using a vibrant green shade, and add pink-colored accents to represent grass flowers. Imagine the baby deer standing contentedly among the grass.
Congratulations! You’ve successfully completed this easy deer drawing tutorial. With careful steps and attention to detail, you’ve created a charming representation of a baby deer. We hope you enjoyed this tutorial and feel inspired to explore more drawing ideas. Remember to subscribe to our YouTube channel, “Draw With Pappu,” for more tutorials and artistic inspiration. Thank you for joining us on this creative journey!
You must draw the picture and send me your drawing with the help of the link given below. I will definitely try to give your picture in my story.
Also Read: How to Draw a Seahorse


Leave a Comment